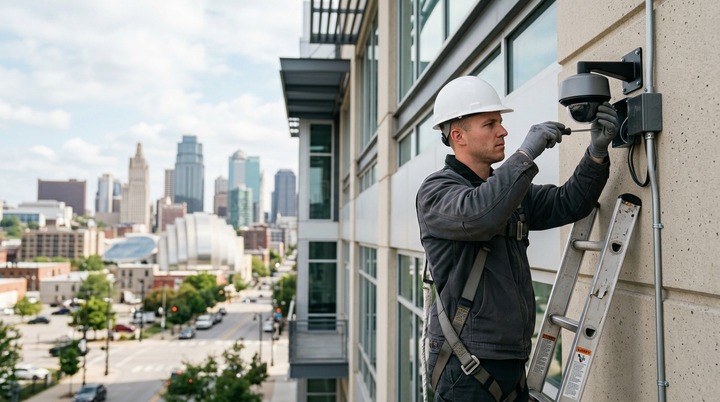
Recent statistics reveal that almost 68% of the homeowners in the United States are installing surveillance systems in their homes because of the growing concern of having their homes broken into and safety risks.
Installing home security cameras requires planning coverage areas, mounting the cameras at an 8-10-foot height, connecting the power and network systems, and setting up the recording, storage, and privacy options to ensure complete home security. Without installation knowledge, homeowners experience blind spots and privacy concerns, and have poor video clarity. This process is made up of layout planning, equipment installation, and testing of the system performance.
This framework explains how to install, legal rules, costs, and timings, tools, and placement of complete home coverage step by step.
Step-by-Step Guide to Install Home Security Cameras
Planning Camera Layout Before Installation
Before the installation of the camera, it is important to plan the layout of the cameras. Make a basic map of your house. Write on all doors, windows, and open spaces. This will enhance the lack of vision and enable coverage planning.
Identifying Key Security Zones
Look at all the first-floor windows, back doors, front doors, and garages. These areas are the most vulnerable when it comes to home invasion in the United States.
Setting Power and Network Access
Look for hot spots in terms of power outlets and WiFi signals. Stable connections will not allow gaps to be recorded or system failures.
Mounting Cameras at 8–10 feet Height
Set cameras 8-10 ft. away from the ground. This range offers a compromise between visibility and coverage of the face and minimises the risk of tampering.
Final angle adjustment and testing
Set up each camera to record walking paths. Test live video for clarity/blind spots during the day and at night.
Essential Tools and Materials Needed
Tools and materials that are essential to a project:
Basic Installation Tools
You should have a drill machine, screws, wall anchors, a screwdriver, a ladder, and a measuring tape. These elements provide a secure mounting.
Wiring and Connection Materials
For a wired connection, use the correct cable, and for outdoor use, protective covers. Wiring that is poor in quality can impact the signal.
Safety Precautions During Setup
When drilling in the vicinity of power lines, make sure to switch off the nearby electrical sources. Prior to mounting, always make sure that the ladder is stable.
Planning Support for Installation setup
Proper planning before installation helps determine camera locations, viewing angles, coverage areas, and cable routing requirements. A well-designed house security cameras system helps identify the required number of cameras, optimize system layout, and estimate material quantities accurately, ensuring complete coverage of entry points, driveways, yards, and other critical areas while minimizing installation issues.
Legal and Privacy Rules for Home Security Cameras in the USA
State Recording Laws
There are privacy rules specific to each U.S. state. There are some that ask for consent to be recorded on audio. Usually, it's possible to record your own video.
Neighbor Privacy Protection
Avoid shooting photographs of neighbour windows or their private yards. This could be in violation of some states' privacy laws.
Indoor Privacy Restrictions
Don't mount cameras in the bathroom or bedroom. These regions need to be guarded with privacy.
Ethical Surveillance Use
Do not use cameras to take pictures of anyone for reasons other than security. Don't over-monitor personal activity in the home.
Cost and Installation Time Breakdown
Installation time estimate
It might take longer for larger homes, depending on the complexity of the wiring and setup in the home.
Cost range in the USA
-
Home-made (Basic): $25 to $150 per camera
-
For mid-range systems, the cost is $150 to $500 per camera.
-
Advanced full home systems: $500-$1000 (plus) all-in-one system.
Cost will vary depending on the number of cameras, wiring, and storage requirements.
Factors Affecting Cost And Time
The cost and installation time are impacted by home size, number of cameras installed, difficulty mounting the cameras, and network configuration.
Room-by-Room Camera Placement Strategy
Camera placement strategy, on a room-by-room basis:
Front Door and Entry Monitoring
Put cameras to face the main entrance to get a clear view of visitors and deliveries.
Living Room and Shared Spaces
Keep an eye on common areas and note the flow of activity in the building.
Covering Garage and Driveway
Secure vehicles, tools, and entry points that are often stolen in thefts.
Staircases and Hallways
Be able to see movement from floor to floor as seen internally.
Backyard and Side Areas
Fill in the blind spots where people can try to get in.
Wired vs Wireless Installation Methods
You can install it in either a wired or wireless manner.
Wired systems
Wired systems provide a reliable video transmission and consistent video recording. They are perfect for big residences.
Wireless systems
Wireless installations are simple to install and move. They are reliant on the strength of the WiFi signal.
Hybrid systems
A large number of homeowners in the USA are using both wired and wireless cameras for a balanced performance.
Home vs. Professional Installation
DIY installation
The DIY setups range in time from 2–8 hours, depending on the tools used, and can be made from scratch. They are inexpensive, but need to be properly planned.
Professional Installation
Experts make sure proper installation, wiring, and full coverage optimization. Perfect for elaborate residences.
Selecting The Right Option
Small houses are ideal for people who want to do it themselves. Homes with multiple floors or larger homes generally require a professional installation.
Recording, Storage, and Data Management
Continuous vs Motion Recording
All activity is continuously recorded. Motion recording frees up disk space and helps avoid data overload.
Storage Planning
With higher-resolution imaging systems, more storage is required. Plan for additional capacity to be on standby.
Backup Systems
Prevent loss of important footage with local/ cloud backups.
Testing and Optimization
Camera Angle verification
Examine all feeds after being installed. Position angles to create no-go situations.
Motion Detection Testing
Go to monitored areas and check the accuracy of the alerts.
Night Vision Testing
Make sure that cameras are able to capture movements in low-light situations.
Common Installation Mistakes
Incorrect placement
If the placement is incorrect, it will result in blind areas and poor coverage.
Weak Network or Power Setup
When the Internet connection is unstable or the power fluctuates, recordings will be interrupted.
Ignoring Storage Needs
Important footage can be automatically overwritten due to low storage.
Conclusion
Installing home security cameras is a task that demands planning, proper positioning, understanding of the legal requirements, and setup of a system for effective home security. An effective system has a greater accuracy of monitoring, fewer blind spots, and greater overall safety.
By grasping the costs, tools, placement strategy, and privacy regulations, long-term performance and responsible use of surveillance systems are assured.
FAQs
What is the optimum height to place home security cameras?
Ideal size is 8-10 feet tall. The height provides better coverage and reduces tampering, and at the same time allows for clear facial surveillance while wide area monitoring.
How long does installation usually take?
Installation should take approximately 2-8 hours, depending on home size, and can be done yourself. Typically, it will take 3 to 6 hours to install a Teleport set in a regular home.
 Venues